Replacement / Maintenance / Adjustment
Updated: 11/06/2007
Hood release part#'s
www.worldimpex.com/
Formerly vwparts.com
(Prices current as of 11/06/2007)
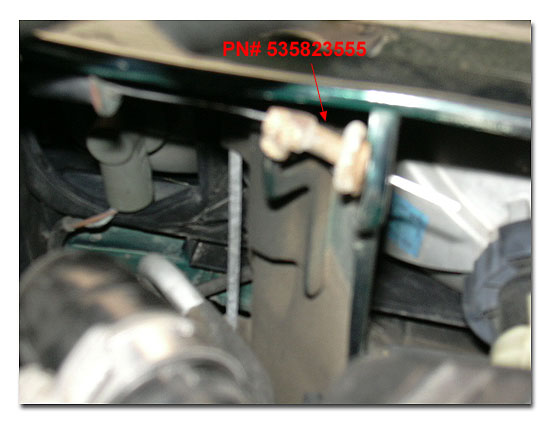
Part number: 535 823 555 (Cable Clamp) Passenger side.
Price: $14.61 Quantity: 1
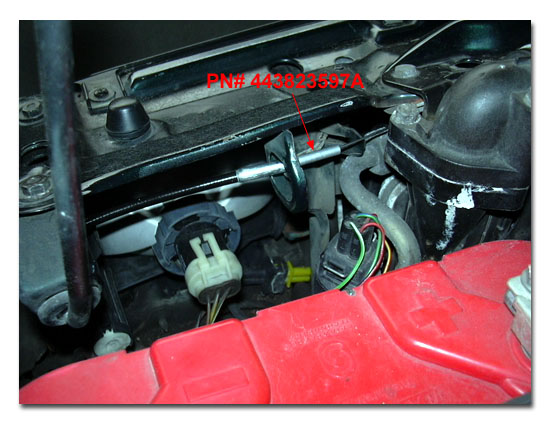
Part number: 443 823 597A (Prot Tube) Driver side.
Price: $6.05 Quantity: 1
Part number: 536 823 531 (Hood Latch Cable) Cable with housing and cable
housing stop.
Price: $77.04 Quantity: 1
Part number: 535 823 567 (Cable Housing Stop) (No
longer Available from VW)
Price: N/A Quantity: 1
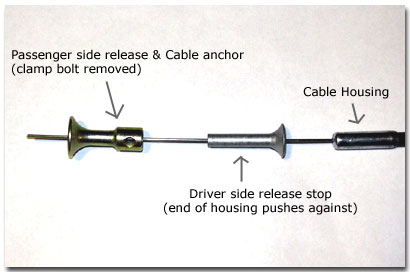
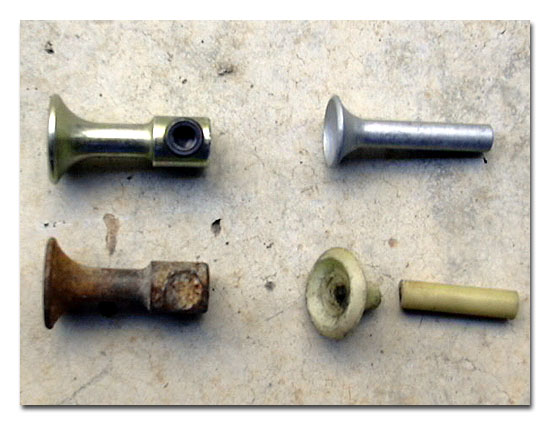
Cable Anatomy
The release cable simply pulls the two hood latch springs
towards the center of the car.
The drivers side spring is acted upon by the end of the cable housing pushing
against a stop
and the passenger side pulled by the cable anchor itself.
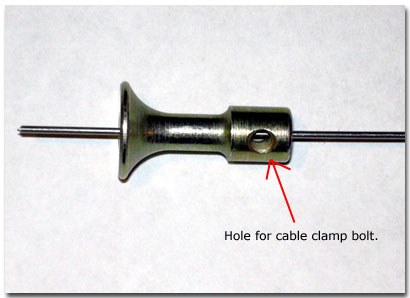
Tightening of the cable is simply done by loosening the bolt
on the cable anchor and pulling
the cable taunt. Don't pull too much or else you will start acting upon the hood
latch springs
and the hood will not latch fully.
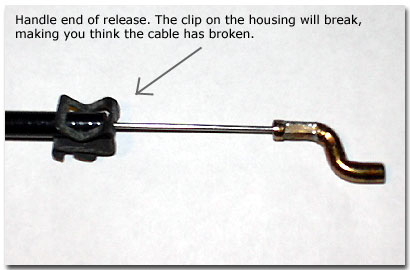
In my case the cable itself didn't break. What happened was
that the metal clip that anchors the
cable housing just above the release handle had snapped. This meant that when I
pulled the handle
the housing moved instead of being stationary. I was able to release the hood by
grasping the housing
and pulling out on the cable.
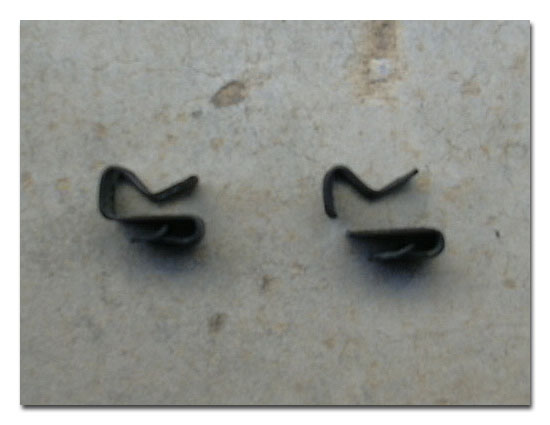
You can buy the clip itself. Part#535 823 567 (Update: This part in no longer available)
I also went ahead and replaced the driver side stop (old one was plastic / new is metal) and the cable anchor.
Replacement
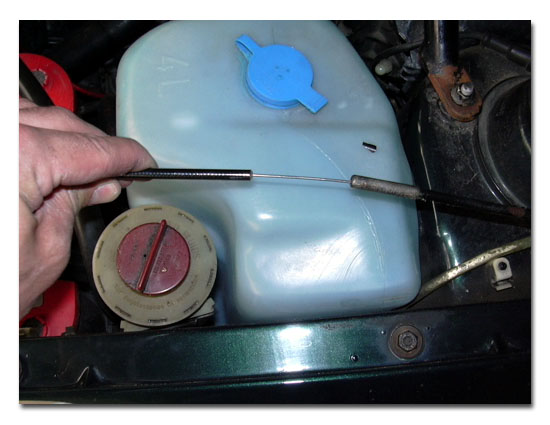
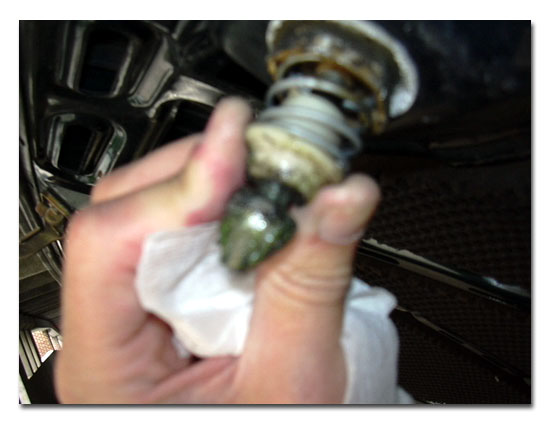
1) You will need to remove the air-box and plastic cover from
behind the passenger headlight.
This will gain you access to the cable anchor. Loosen the clamp bolt and remove
the anchor.
Sorry for the fuzzy picture.
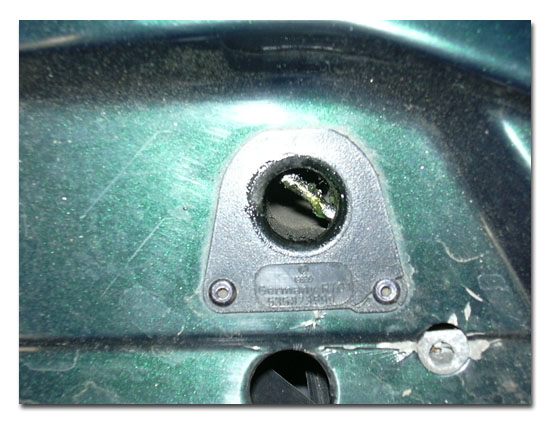
2) Once you have the cable free of the stop you can carefully
pull it out from the driver side.
The cable travels behind the radiator through a bowden tube.
3) To feed the new cable housing through the cowling I slipped
the new housing over the old cable
until it met up with the old housing. I could then push the new housing into the
grommet using
the old cable as a guide.
4) From inside the car you can now anchor the housing into the
stop clip, attach the new cable
to the handle and feed the cable through.
Tip: I did lubricate the new cable with Tri-Flow
oil before sliding it through.

5) Back outside now you can feed the cable through the driver
side housing stop and hood release spring
and guide it back through the bowden tube. As it comes out on the passenger
side, carefully guide the cable
through the other hood release spring and cable anchor.
6) Before tightening the locking bolt you want to pull the
cable snug while pushing the cable anchor against the spring.
** See note at the bottom of the page
clarifying the cable adjustment.
7) Once you have the cable anchored (hood still open....don't
get greedy yet) give the release handle some good
hard pulls. This will seat the housing and cable stops and will generate some
slack in the cable. You can then
loosen the anchor bolt and retighten the cable.
You're almost done!
8) One of the keys to a smooth opening hood is to make sure
the latch pins are lubricated and adjusted correctly.
If the pin is adjusted too short the the hood will be difficult to release. Too
long and the hood will
not be held down snug. It is the springs on these pins that pops the hood up
when the cable is pulled.
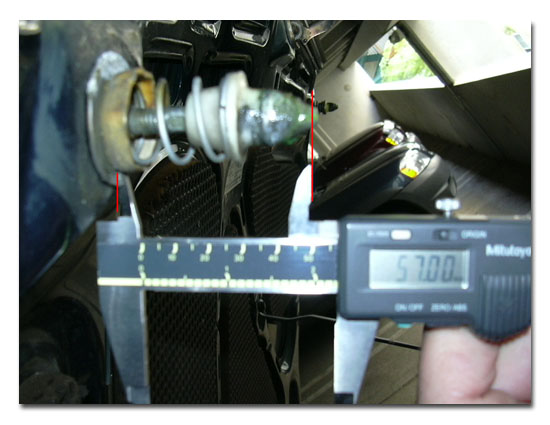
From the base of the pin to the end of the pin should be 57mm. You can simply
adjust it with a couple of wrenches.
9) Finally you need to lubricate the hood pin and latch
spring. I used a high quality waterproof
bicycle hub grease.
10) Now you can close the hood, hold your breath, pull the handle and hope the hood opens back up.
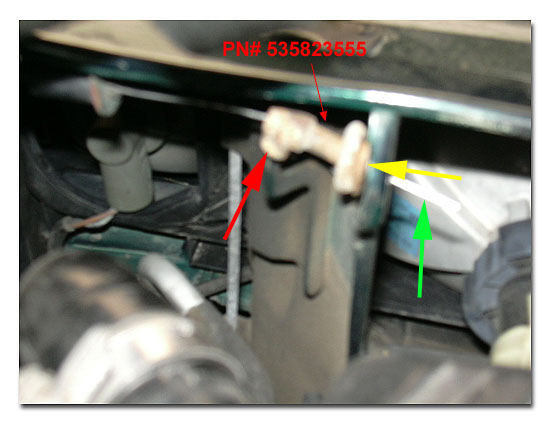
**Addition (10/31/2007) Clarifying cable adjustment
Loosen anchor bolt (Red arrow)
Pull on cable (Green arrow) while pushing against the cable stop (in direction
of Yellow arrow).
Tighten anchor bolt.
Did you find this info useful? Feel free to buy me a beer ![]()
|Headgasket, Timing Chain, Cooling System Parts|